Comprehensive Bed Bug Heat Treatment Setup & User Guide
Successfully setting up and operating a bed bug heat treatment system is essential for eliminating these pests from your environment. This guide is designed to help you efficiently implement our bed bug heat treatment system following clear, step-by-step instructions.
Please ensure all preparatory steps listed in our Customer Preparation Sheet are completed before starting.
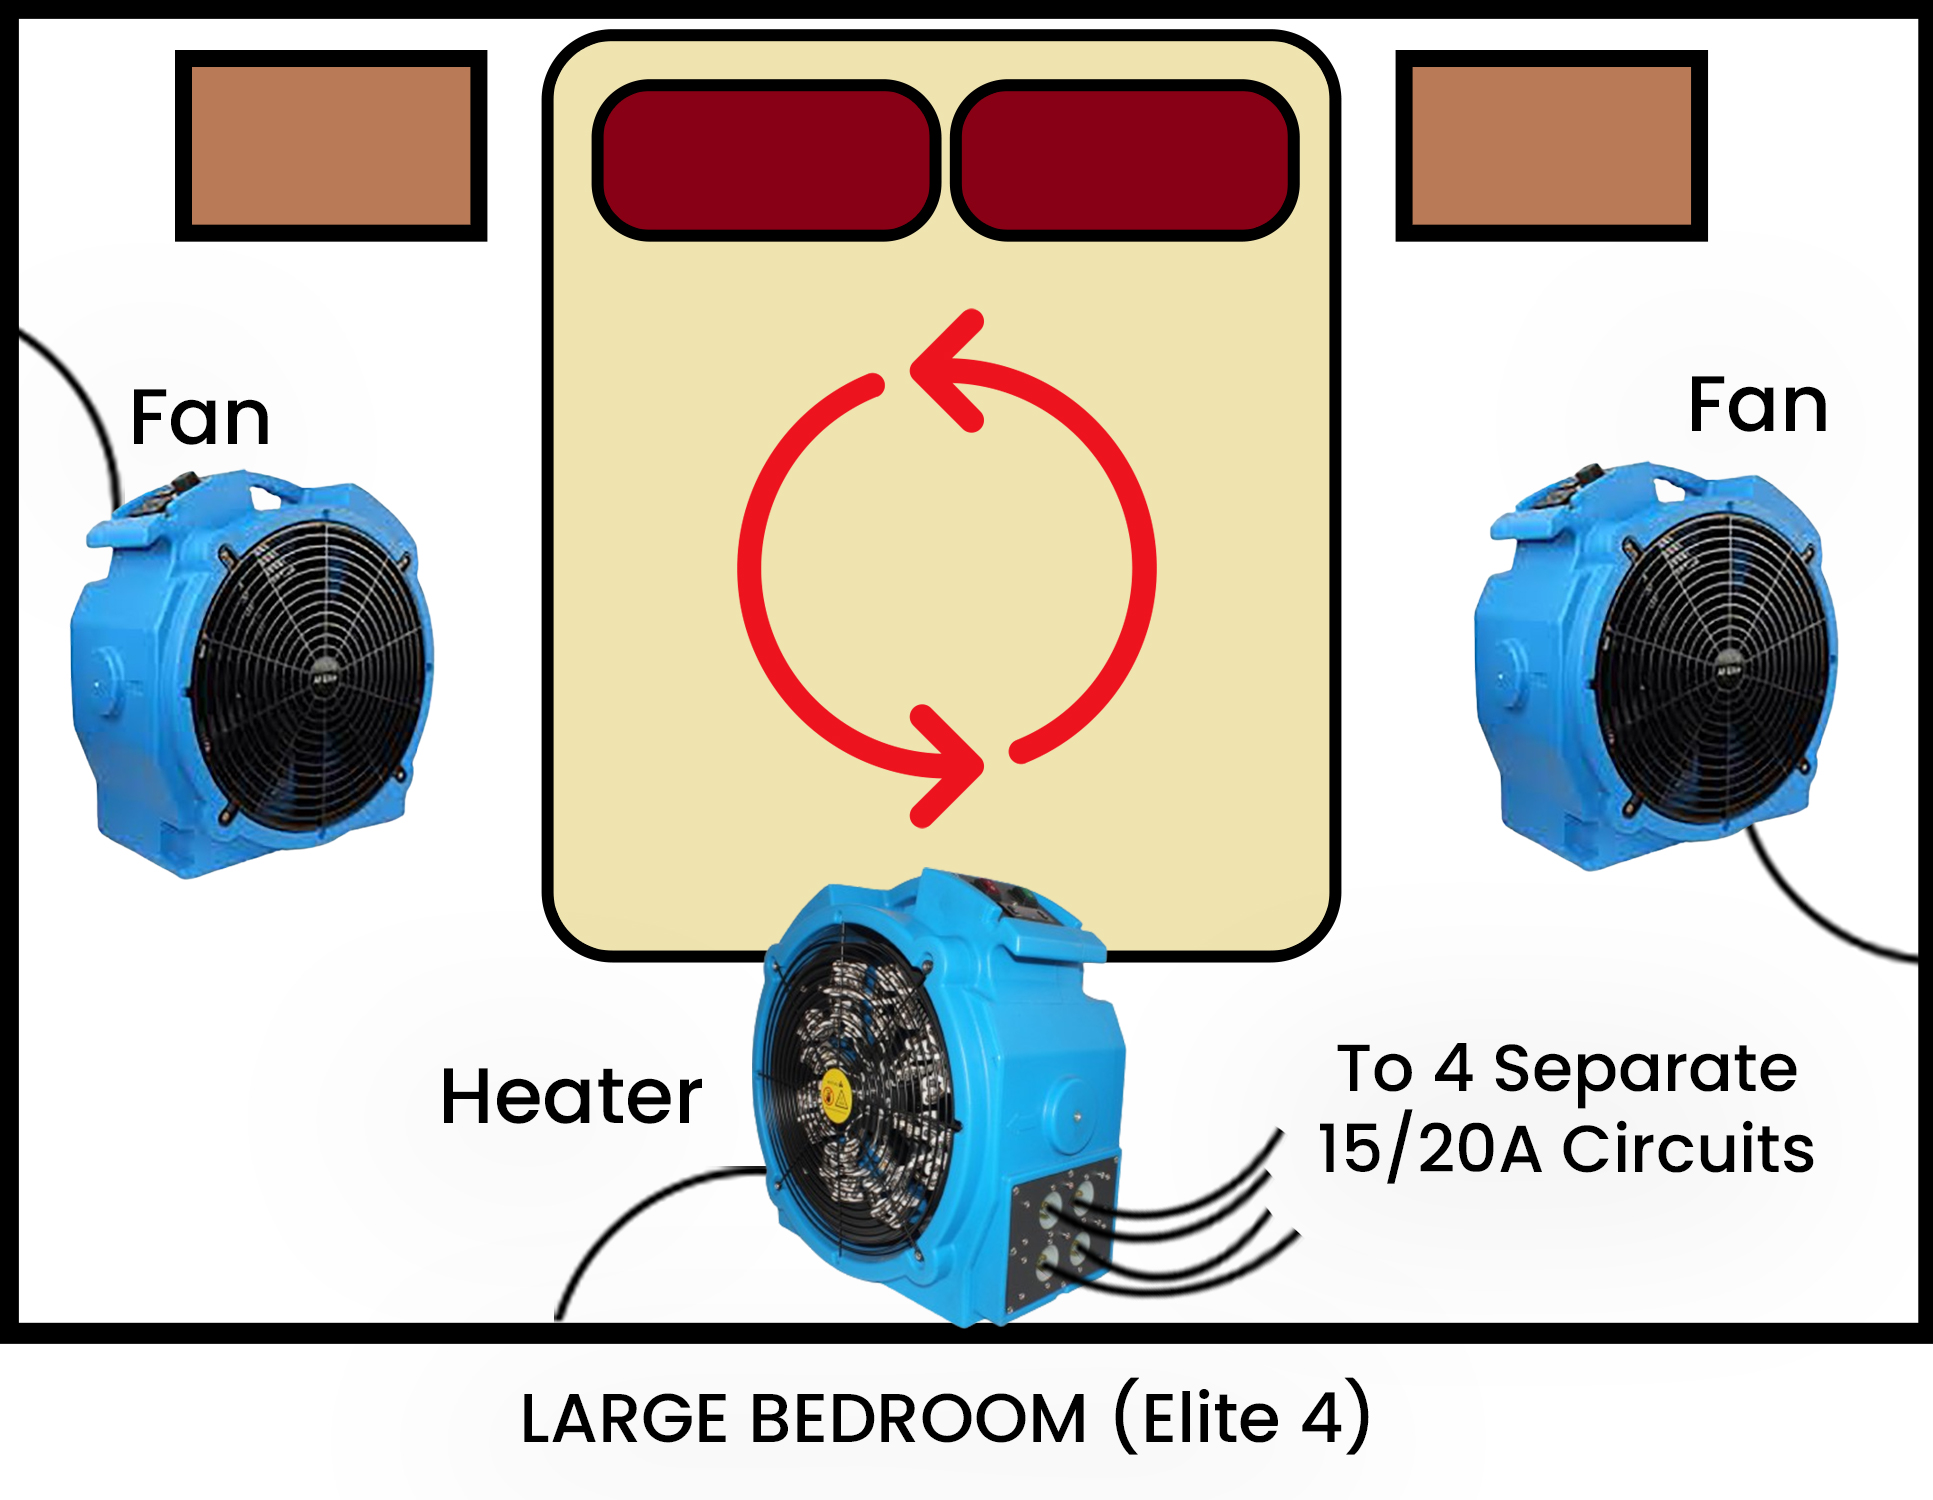
1. Single Room Heater and Fan Setup
For effective heat treatment in a single room:
- Compact Bedrooms: Position air-moving fans in any open space near the bed, and slightly move furniture away from walls to facilitate airflow.
- Larger Spaces: Set up a circular airflow pattern, akin to a convection oven, to ensure even heat distribution throughout the room.
Tip: Aim a fan towards the closet to evenly distribute air between the closet and the main room. Make sure the heater has enough clearance to operate safely and avoid placing electronics where they will be exposed to direct heat. Adjustments may be necessary during the treatment process.
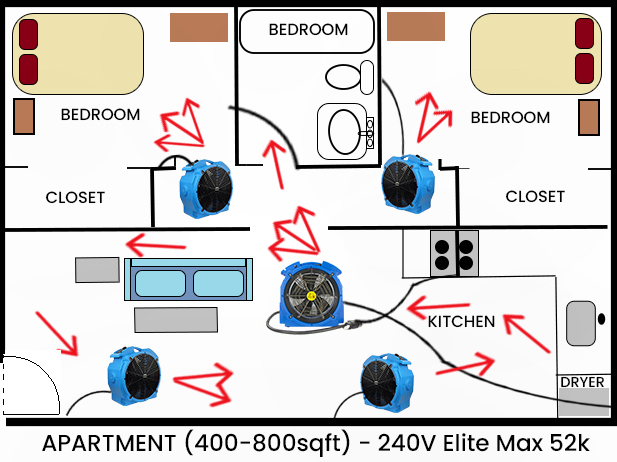
2. Multi-Room or Whole House Setup
When treating multiple rooms or an entire house:
- Place heaters and air movers centrally, similar to a racetrack, to enhance airflow and heat distribution.
- Use additional fans at doorways and hall entries to push heated air into each room effectively.
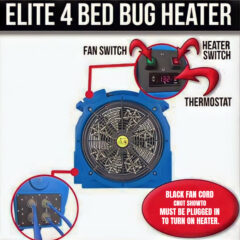
3a. Heater Setup for Small Spaces (Elite 4 Model)
(Each ‘blue wire’ heating element draws 12 amps)
- Connect the black power/fan cord to any room wall outlet.
- Insert four blue heater element cords into the side ports of the unit.
- Extend blue cords under the door and plug each into separate 15 or 20 amp circuits across the bathroom, living room, and kitchen. Use one cord per circuit to avoid exceeding breaker capacity. Ensure each cord is connected to a distinct circuit.
- All heating elements are operational independently; using all is not mandatory.
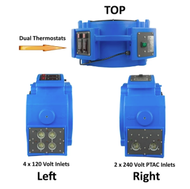
3b. Heater Setup for Larger Areas (VersaPro Model)
- 110V Option: Functions like the Elite 4, capable of heating up to 400 sqft.
-AND- - 220V Option: Utilize two large black cords with a “Y” adapter to connect to a 40 amp stove outlet for full power, adding an extra 500 sqft heating capacity. Alternatively, connect one large black cord to a dryer or hotel A/C for half power, extending heating capacity by 250 sqft.
- Flexibility: Employ any combination of heating elements simultaneously.
4. Setting Up Air Moving Fans
Connect all fans to available outlets. Their low amperage draw ensures they do not overload the circuits.
5. Starting the Equipment
Ensure all connections are secure and operational. Activate the system by turning on the air movers and then the heater, setting the temperature to a pre-set 135 °F.
6. Monitoring the Process
- Regularly monitor the system to ensure smooth operation and check for any tripped breakers.
- If a 110V (15or20Amps) breaker trips, it may indicate two blue heater element wires are on the same circuit, each drawing 12Amps. Relocate one wire to a different circuit and reset the breaker.
- Achieving target temperatures usually takes 7-12 hours, depending on room size and building structure.
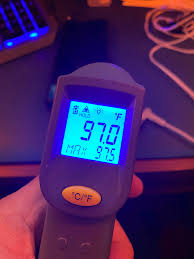
- Utilize the provided laser thermometer to measure temperatures across the room extensively, including inside drawers, under clothes piles, behind furniture, and within closet items.
- Direct air moving fans towards cooler spots during treatment to ensure even heat distribution.
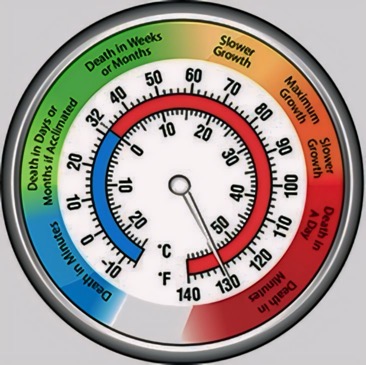
Heat the space until all areas reach a minimum of 120°F, typically requiring 15-20 hours.
Once target temperatures are reached throughout, continue heating for at least four more hours.
Note: Larger items like beds and inside wall cavities may take longer to reach the desired temperature, so patience is key to achieving 100% success. Avoid prematurely shutting down the system.
7. Ensuring Comprehensive Heat Coverage
For thorough treatment, agitate clothes, separate stacked items, and rearrange furniture periodically. This exposes all potential hiding spots to the heat, ensuring complete eradication.
8. Shutting Down
Note: it’s important to exercise extreme caution during this process due to the intense heat. This step is undertaken entirely at your own risk, and we cannot be held responsible for any injuries resulting from it.
9. Post-Treatment Care
- Turn off the heating elements by pressing the red button(s) first, then switch off the fan once heating is complete.
- Allow the room to cool naturally by opening windows gradually over several hours to avoid potential damage to belongings. If using air conditioning or additional ventilation, wait until temperatures drop below 100°F if feasible.
- Disconnect and store all equipment, ensuring cords are neatly wrapped. If pickup is arranged, place everything by the front door.
- Wait several hours before powering up any electronic devices.
- After complete cooling, thoroughly clean the area and launder all clothing, linens, and bedding on high heat. Consider using a residual bed bug pesticide spray for added protection, though it’s optional.
For a Free Estimate or More Information Contact Us Today!